 Save to Pinterest
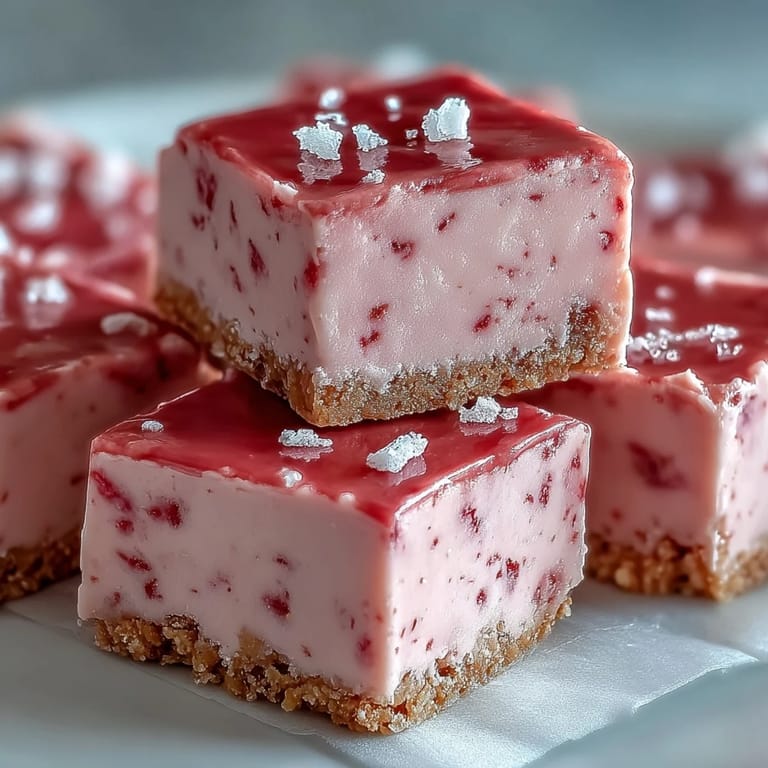
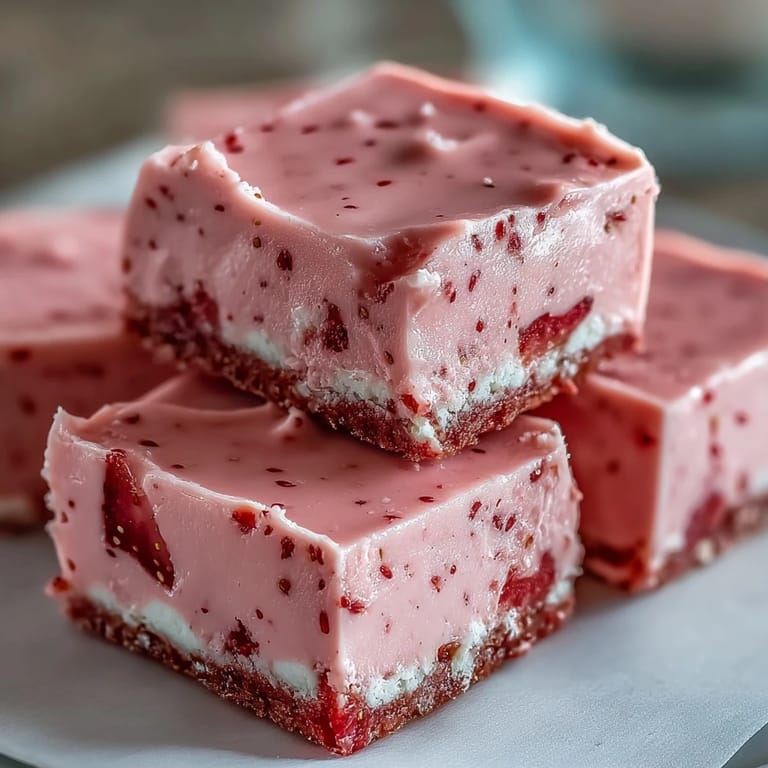
 The first time I made these, I was skeptical about the combination. White chocolate and strawberries seemed too obvious, almost cliché. But one bite of that creamy, tangy fudge layer over buttery graham crust changed everything. Now they are my go-to when I need something impressive but absolutely no-stress for last minute guests.
I brought these to a summer potluck last year and watched three different people ask for the recipe within five minutes. My friend Sarah, who claims she does not like white chocolate, went back for seconds. The balance of sweet and tangy just works somehow, like when you find the perfect song you did not know you needed.
Ingredients
- 200 g digestive biscuits or graham crackers: Finely crushed because uniform crumbs create a stable base that will not crumble when you slice later
- 100 g unsalted butter, melted: The fat binds everything together and unsalted lets you control the seasoning
- 200 g white chocolate chips: High quality makes a difference here since it is the main flavor component
- 395 g sweetened condensed milk: This creates the fudgy texture and sweetness without needing additional sugar
- 50 g freeze-dried strawberries: Ground to powder gives concentrated strawberry flavor without adding extra moisture that would ruin the texture
- 1 tsp pure vanilla extract: Rounds out the sweetness and adds depth
- Pinch of salt: Essential to balance the intense sweetness
- Pink or red gel food coloring: Optional but makes the color pop and look like the strawberry flavor it actually contains
Tired of Takeout? 🥡
Get 10 meals you can make faster than delivery arrives. Seriously.
One email. No spam. Unsubscribe anytime.
Instructions
- Prep your pan:
- Line a 20 cm square baking pan with parchment paper, leaving that 2-3 cm overhang on two sides because this is how you will lift the whole thing out later like a pro.
- Make the crust:
- Combine crushed biscuits and melted butter in a large bowl, stirring until every crumb is coated and the mixture holds together when you squeeze it in your hand.
- Press it down:
- Firmly press the crumb mixture into your prepared pan in an even layer, using the back of a spoon or a flat-bottomed glass to really compact it.
- Chill briefly:
- Pop the crust in the refrigerator for 10 minutes while you prepare the fudge layer so it sets up enough to hold the filling.
- Melt the chocolate:
- Place white chocolate chips and sweetened condensed milk in a heatproof bowl over a saucepan of simmering water, stirring gently until completely melted and smooth.
- Add the strawberry:
- Remove from heat and stir in your freeze-dried strawberry powder, vanilla, salt, and food coloring until the color is uniform and glossy.
- Spread the fudge:
- Pour the strawberry fudge mixture over your chilled crust and spread it evenly with a spatula, making sure it reaches all corners.
- Chill until firm:
- Cover loosely with plastic wrap and refrigerate for at least 2-3 hours until the fudge layer is firm to the touch, no longer sticky.
- Slice and serve:
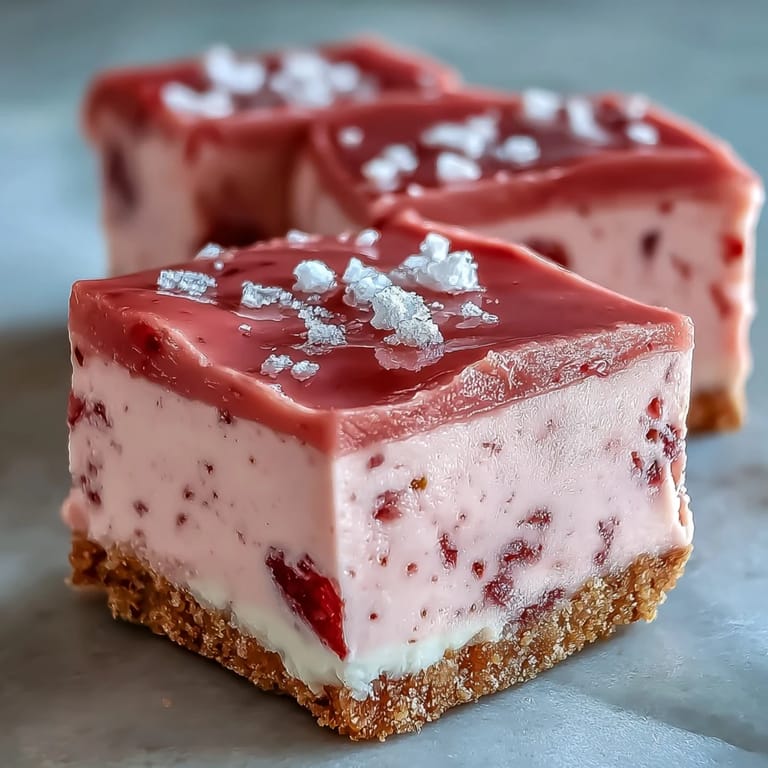
- Lift the whole thing out using the parchment overhang, place on a cutting board, and slice into 16 squares with a sharp knife, wiping the blade clean between cuts for those picture-perfect edges.
 Save to Pinterest
 My daughter helped me make these last Valentine's day and we ate them standing at the counter, still slightly too cold from the fridge, laughing about the pink mustaches. Sometimes the simplest desserts create the best moments.
Working with White Chocolate
White chocolate is finicky and can separate if you get water in it or overheat it. Keep the water in your double boiler at a gentle simmer, not a rolling boil. If your mixture does seize, whisk in a teaspoon of vegetable oil to try to save it.
Getting That Perfect Color
The strawberry powder naturally turns the fudge a pale pink, but gel food coloring gives you that vibrant bakery look. Start with one drop and add more until you reach your desired shade. Remember, the color deepens slightly as it chills.
Storage and Serving
These keep beautifully in the refrigerator for up to 5 days in an airtight container. For the best texture, let them sit at room temperature for about 10 minutes before serving.
- Place a piece of parchment paper between layers if you need to stack them
- These also freeze well for up to 2 months, wrapped tightly
- Serve with fresh berries on the side for extra contrast
 Save to Pinterest
 These squares have become my emergency dessert for every occasion because nobody needs to know how incredibly easy they were to make.
Answers to Recipe Questions
- → What's the best way to get clean cuts when slicing these squares?
For perfectly neat squares, ensure the fudge is thoroughly chilled and firm. Use a sharp knife and wipe the blade clean with a warm, damp cloth between each cut. This prevents sticking and keeps the edges tidy.
- → Can I use fresh strawberries instead of freeze-dried powder?
Yes, you can. If using fresh strawberries, purée about 100g and strain it to remove excess liquid and seeds before incorporating it into the fudge mixture. Be aware that this might slightly alter the final texture and color intensity compared to freeze-dried powder.
- → How should I store these squares, and for how long?
Store the No-Bake Strawberry Fudge Squares in an airtight container in the refrigerator. They will maintain their freshness and texture for up to 5 days. For the best serving experience, allow them to sit at room temperature for 5-10 minutes before enjoying.
- → What if I don't have a double boiler for melting the chocolate?
If you don't have a double boiler, you can create one by placing a heatproof bowl over a saucepan of simmering water, ensuring the bottom of the bowl does not touch the water. Alternatively, you can carefully melt the white chocolate and condensed milk in a microwave on low power, stirring frequently in 15-20 second intervals to prevent scorching.
- → Are there any suitable substitutions for the graham cracker crust?
Absolutely! Digestive biscuits are a common and delicious substitute. You could also use shortbread cookies, vanilla wafers, or even gluten-free cookie crumbs if you need a gluten-free option, ensuring they are finely crushed and mixed with melted butter.