 Save to Pinterest
 The first time I made this, I was standing in my kitchen on a lazy Sunday afternoon, craving sushi but too lazy to roll anything by hand. I remembered a friend mentioning something about baked sushi, and I thought, why not just layer it all like a casserole? Twenty minutes later, the smell of melting mozzarella mixed with sesame and sriracha had me genuinely surprised at how well it worked. Now it's become my go-to when I want sushi vibes without the precision rolling demands.
I made this for my coworkers' potluck last spring, and honestly, I was nervous bringing a fusion casserole to a crowd of sushi purists. But watching people come back for seconds, asking if I'd made it myself, asking for the recipe—that's when I realized this dish had found its place. It turned out that sometimes breaking the rules and mixing tradition with comfort food is exactly what people needed.
Ingredients
- Sushi rice: The base matters more than you'd think—sushi rice has a stickier texture that holds everything together, and rinsing it first removes excess starch so you get that tender, individual grain texture.
- Rice vinegar, sugar, and salt: This trio seasons the rice the traditional way, giving it that subtle tang and slight sweetness that makes sushi taste like sushi, not just plain rice.
- Cooked chicken breast: Use rotisserie chicken if you're short on time—it's already seasoned and stays moist, plus there's something honest about taking shortcuts when they actually taste better.
- Kewpie mayonnaise: It's creamier and richer than regular mayo, and once you use it, regular mayo feels thin by comparison; it's worth the extra trip to find it.
- Cream cheese and sriracha: These two balance each other—cream cheese smooths everything out while sriracha adds heat and depth that keeps the bake from feeling too mild.
- Soy sauce: Just a tablespoon, but it's the quiet umami anchor that ties the whole filling together.
- Green onions: Sliced fresh and folded in raw, they give you a bright bite against the richness of everything else.
- Mozzarella cheese: Melts evenly and gets those golden spots; it's the binder that holds the layers together as it bakes.
- Furikake seasoning: Sprinkle it both under and over the chicken layer—it adds nori flavor, sesame crunch, and those little umami punches that make people wonder what your secret ingredient is.
- Avocado: Always add this after baking so it stays fresh and creamy; heat would turn it bitter and mushy.
- Nori and sesame seeds: These go on at the very end, giving you texture and that authentic sushi-roll feeling without any of the rolling effort.
Tired of Takeout? 🥡
Get 10 meals you can make faster than delivery arrives. Seriously.
One email. No spam. Unsubscribe anytime.
Instructions
- Set yourself up for success:
- Preheat your oven to 400°F and grease that 9x9-inch dish so nothing sticks. This takes two minutes and saves you from scraping later.
- Cook the rice the right way:
- Rinse your sushi rice under cold water until the water runs clear—this is non-negotiable because it removes starch that would make the rice gluey. Boil it with 2 1/2 cups water, cover, and let it simmer for exactly 15 minutes, then rest covered for 10 more; rushing this step means mushy rice that falls apart when you scoop it.
- Season the rice:
- While the rice rests, dissolve rice vinegar, sugar, and salt together in a small bowl, then fold it gently into the warm rice using a spatula or wooden spoon. Fold, don't stir—you want to coat each grain without crushing it.
- Build your chicken filling:
- Mix your shredded chicken with Kewpie mayo, softened cream cheese, sriracha, soy sauce, and sliced green onions in a bowl until it's creamy and cohesive. This should taste a little bold on its own because it's about to be balanced by the rice underneath.
- Layer the base:
- Spread the seasoned rice evenly in your prepared dish, then sprinkle a tablespoon of furikake over it like you're seasoning a canvas. This layer gives the rice its own flavor so it's not just a blank vehicle for the chicken.
- Add the chicken and cheese:
- Spread your chicken mixture in an even layer over the rice, then top with shredded mozzarella and the remaining furikake. The cheese will melt and bind everything together while the furikake seasons from above.
- Bake until golden:
- Bake for 20 to 25 minutes at 400°F until the cheese is melted and starting to get those golden, slightly crispy edges. You'll know it's done when it smells like toasted sesame and melted cheese, not before.
- Finish with fresh toppings:
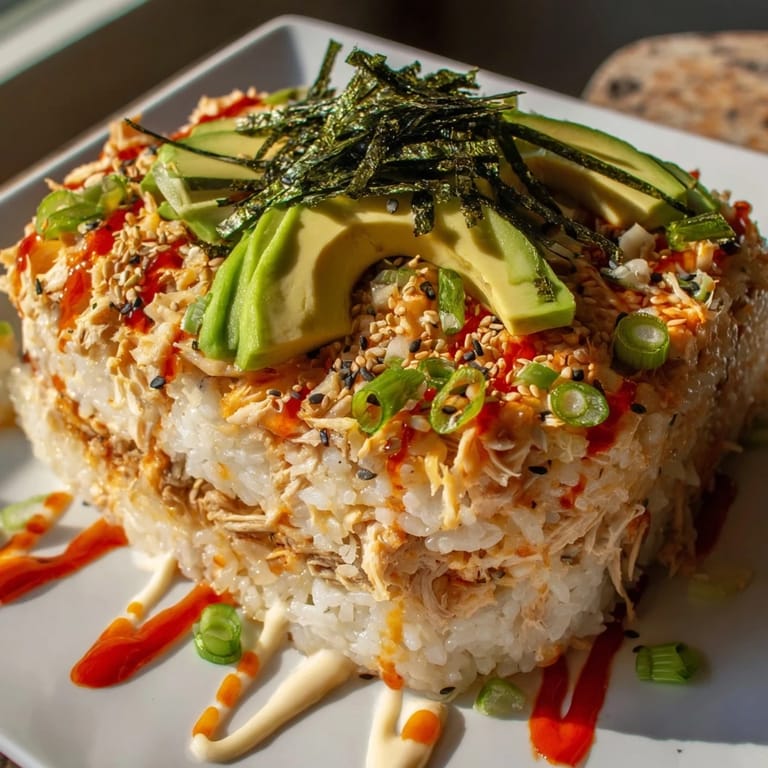
- Let it cool for just 5 minutes so you can handle it, then top with sliced avocado, nori strips, toasted sesame seeds, and drizzles of extra sriracha and mayo. The cooling prevents the avocado from wilting, and those fresh toppings give you brightness and texture against the warm, creamy layers below.
 Save to Pinterest
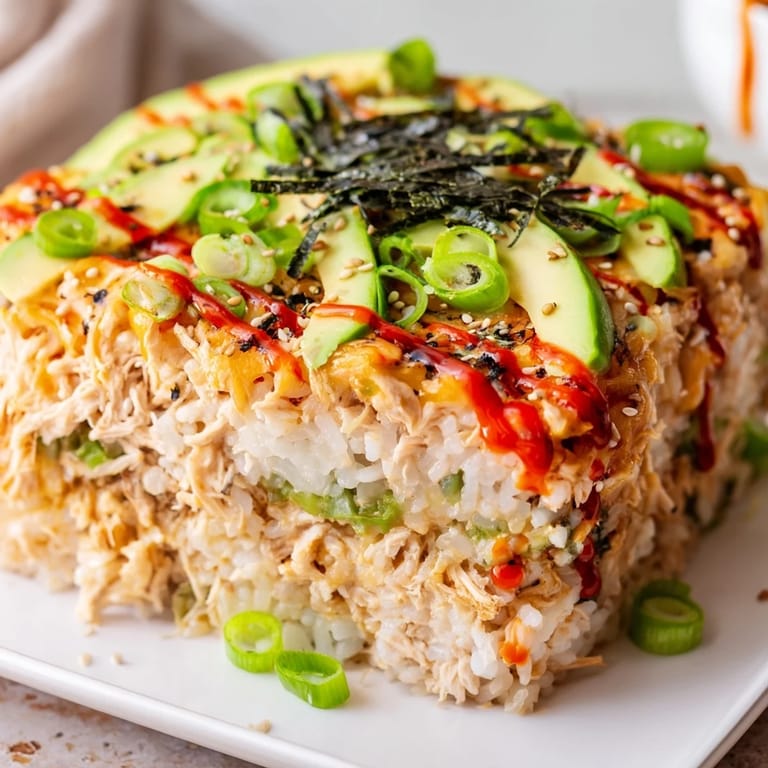
 There was this quiet moment after I pulled the bake out of the oven, watching it cool while the kitchen filled with this aroma that was somehow both Japanese and comfort-food familiar. My partner walked in, took one look at it, and said it looked like someone had deconstructed a sushi roll and turned it into something you could actually sit down and relax with. That comment stuck with me because that's exactly what this dish is—sushi's sophistication without its intimidation factor.
Why This Works as a Fusion Dish
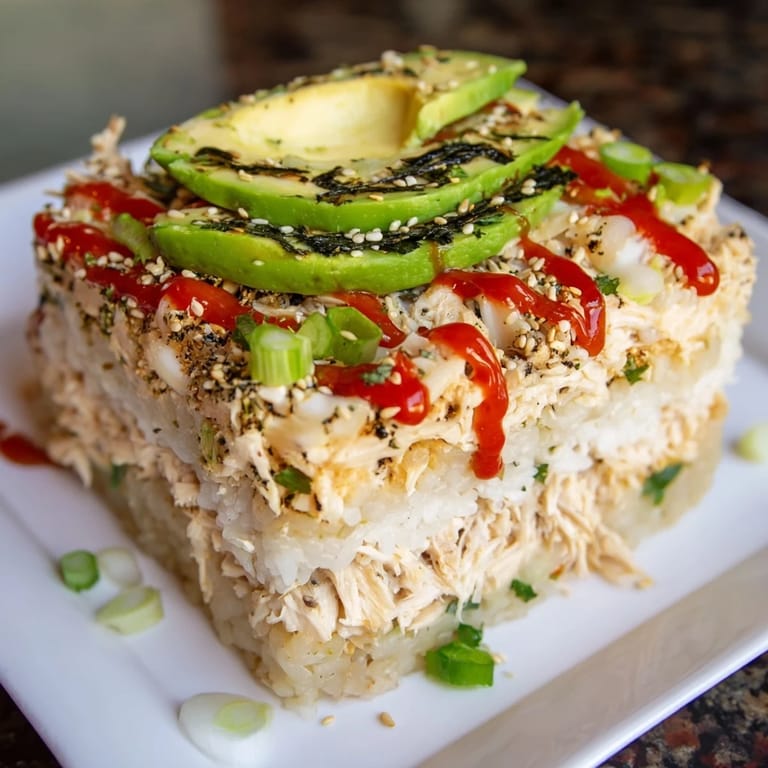
The beauty of this bake is that it respects both sides of its inspiration. You've got the aromatic rice seasoned the traditional way, the nori and furikake for authenticity, but then you layer in creamy mayo and mozzarella that makes it feel like a casserole you'd bring to a potluck. It's not trying to trick anyone into thinking it's real sushi—it's honest about being something new, something that takes the flavors and textures people love about sushi and repackages them in a form that's easier and warmer. That's when fusion cooking actually works.
Making It Your Own
One of my favorite things about this recipe is how easily it bends to what you have on hand or what you're craving that day. I've made it with rotisserie chicken when I was short on time, and honestly, it tasted better because rotisserie chicken comes seasoned and has more flavor than plain cooked breast. I've also added diced cucumber for freshness, pickled ginger for tang, or even leftover cooked shrimp mixed into the filling. The foundation is solid enough that you can play around with the details, and it'll still work.
Serving and Storage
Serve this warm, scooped onto small plates or even onto individual nori sheets if you want people to eat it with their hands like they're eating sushi. It looks beautiful that way, and there's something fun about the informality of it. Leftovers keep well in the fridge for three days covered, and you can reheat them gently in the oven at 350°F for about 10 minutes without drying anything out.
- For a spicier version, drizzle extra sriracha on top and increase the sriracha in the filling to 1 1/2 tablespoons if you like real heat.
- If you want to make this ahead, prep everything the night before and assemble it in the morning, then pop it in the oven when you're ready to eat.
- This feeds about 6 people as a main dish, but go bigger or smaller depending on your crowd—just adjust the baking dish size and timing accordingly.
 Save to Pinterest
 This dish has become something I make when I want to feel like I'm cooking something special without the stress, and that's the whole point. It brings people together around something warm, flavorful, and a little bit unexpected.
Answers to Recipe Questions
- → What type of rice is best for this dish?
Sushi rice works best due to its sticky texture, which helps the casserole hold together nicely after baking.
- → Can I use rotisserie chicken?
Yes, rotisserie chicken is a convenient choice that adds extra flavor and reduces prep time.
- → How spicy is the casserole?
The dish has a mild to moderate spice level from sriracha, which can be adjusted to taste or omitted if preferred.
- → What does furikake add to the bake?
Furikake seasoning delivers a savory, umami-rich crunch with sesame, seaweed, and fish flakes enhancing flavor complexity.
- → Can I add veggies to this dish?
Yes, fresh diced cucumber or pickled ginger make excellent additions for brightness and texture contrast.