 Save to Pinterest
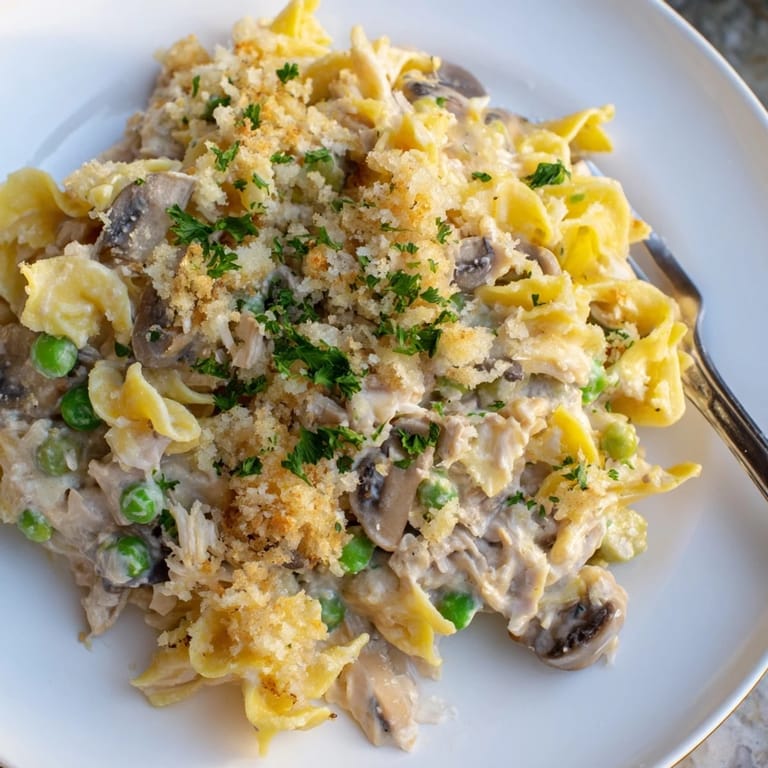
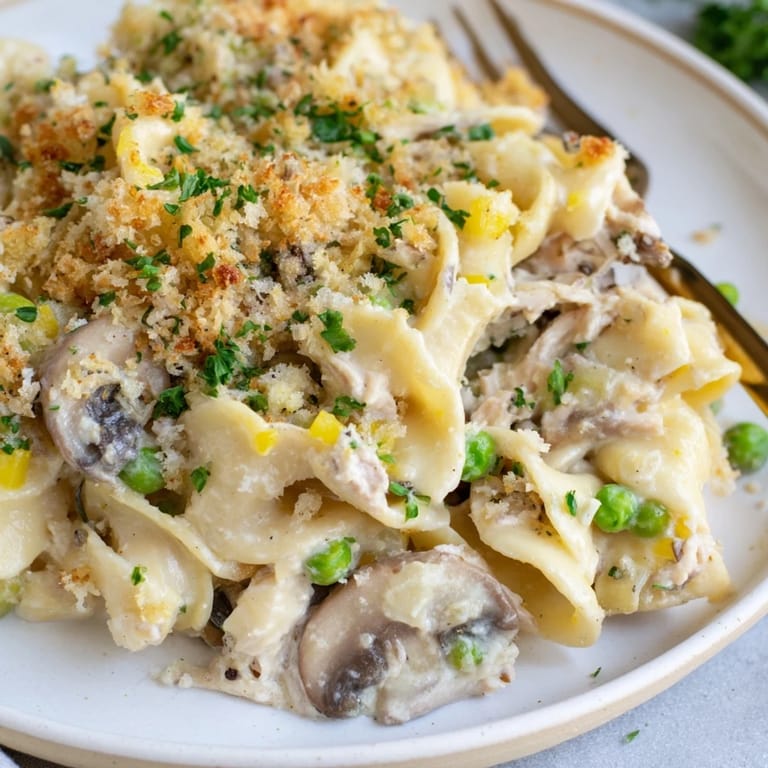
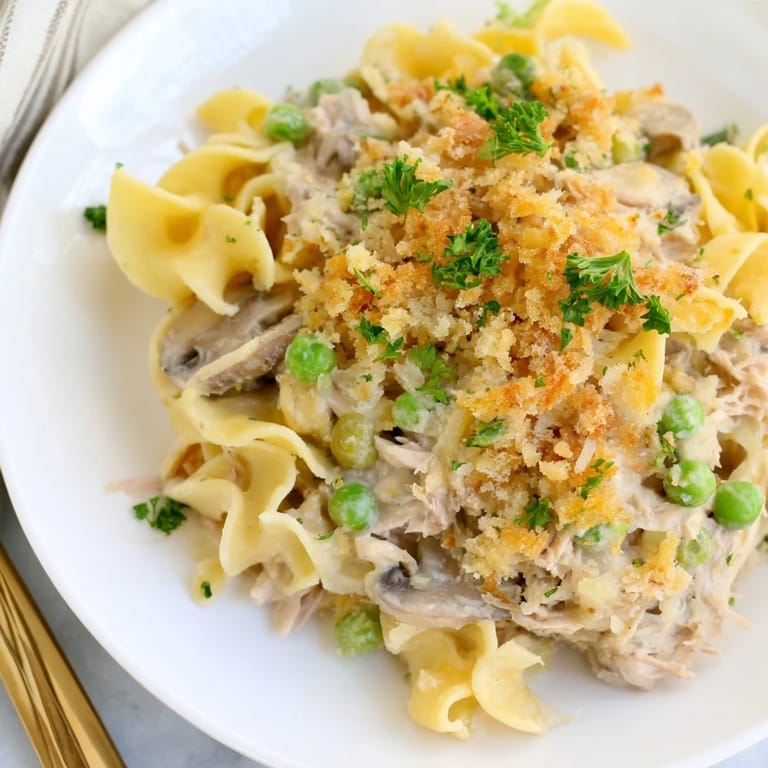
 There's something about tuna noodle casserole that transports you instantly to someone's kitchen table, where comfort and practicality meet on a Wednesday night. I stumbled onto this updated version while trying to rescue a tired family dinner routine, trading canned cream soup for a from-scratch sauce that actually tastes like something. The magic happened the first time I pulled it from the oven—the panko-parmesan topping had turned the most gorgeous golden brown, and my kitchen smelled like butter, garlic, and home all at once. My partner walked in mid-bake and just stood there, inhaling deeply, and that's when I knew this version had staying power.
I made this for my friend Sarah on a rainy Sunday, and she brought her two kids over because her kitchen was being renovated. Watching her youngest fork into that casserole with zero hesitation told me everything—this isn't the kind of dish that needs convincing. By the third bite, she was asking for the recipe, and the toddler was actually eating vegetables without complaint, which felt like actual magic.
Ingredients
- Egg noodles: Al dente is your target; they'll soften slightly in the oven, so don't overcook them at the start or you'll end up with mush.
- Solid white tuna: Drain it well and break it into chunky pieces rather than shredding—you want visible tuna throughout, not a blended fish taste.
- Frozen peas: Thawed peas keep their color and texture better than fresh ones in a long bake, and they add gentle sweetness against the savory sauce.
- Cremini mushrooms: Slice them thin so they cook down quickly and distribute flavor evenly; they add an earthy depth that lifts the entire dish.
- Yellow onion and celery: These build the flavor foundation—don't skip the sauté step, as it transforms them from raw to sweet and mellow.
- Butter and flour: This roux creates the sauce structure; watch it carefully so the flour toasts slightly but doesn't brown.
- Broth and milk: A mix of both keeps the sauce rich but not heavy, and low-sodium broth lets you control the salt level.
- Sour cream: Added off heat so it doesn't break, this adds tang and creaminess that cream alone can't deliver.
- Dijon mustard: Just half a teaspoon, but it whispers sophistication and brightens everything without making itself known.
- Panko and parmesan topping: Panko stays crispy longer than regular breadcrumbs, and parmesan adds salty umami that makes people keep reaching.
Tired of Takeout? 🥡
Get 10 meals you can make faster than delivery arrives. Seriously.
One email. No spam. Unsubscribe anytime.
Instructions
- Set up and preheat:
- Heat your oven to 400°F while you prepare the dish. A hot oven means the topping will crisp before the casserole dries out underneath.
- Cook the noodles:
- Salted boiling water is essential here—this is your only chance to season the noodles themselves. Pull them just before they feel fully done; they'll take a gentle swim in the creamy sauce anyway.
- Build the sauce base:
- Melt butter over medium heat and let the vegetables soften slowly. This isn't a race; you want the onions to turn translucent and sweet, and the mushrooms to release their moisture.
- Make the roux:
- Dust the softened vegetables with flour and stir for a minute so it coats everything. This toasts the flour slightly and prevents lumps when you add the liquid.
- Combine liquid carefully:
- Pour broth in gradually while whisking constantly, then add milk and let it simmer until visibly thickened. You'll see it go from loose to silky in about four minutes.
- Finish the sauce off heat:
- Remove the skillet from the stove before stirring in sour cream, mustard, salt, and pepper. Off-heat means the sour cream stays creamy and doesn't curdle.
- Fold in everything:
- Add tuna, peas, and noodles gently so you don't break up the tuna pieces. A spatula works better than a spoon for this.
- Top and bake:
- Mix panko, parmesan, and melted butter in a small bowl until it feels like wet sand, then scatter it evenly across the top. This mixture should sizzle when it hits the hot casserole.
- Bake until golden:
- Watch for the topping to turn deep golden and the sauce to bubble at the edges, which usually takes 20-25 minutes. Don't skip the standing time; five minutes lets everything set slightly so it slices cleanly.
 Save to Pinterest
 I served this at a dinner party once, and a guest who claimed she never ate casseroles went back for thirds and asked to stay for dessert just so she could have another bite while it was still warm. That's the moment I realized this wasn't just food for quiet Wednesday nights—it's the kind of dish that deserves a place at the table when you're trying to impress.
Why Fresh Vegetables Transform This Dish
The vegetables here aren't just filler; they're the difference between a one-note casserole and something with actual dimension. When you sauté the mushrooms and aromatics before everything else, you're drawing out their natural juices and concentrating their flavor, which then becomes part of the sauce. The peas add sweetness that balances the savory elements, and the celery contributes a subtle herbaceous note that keeps everything from tasting flat. I learned this the hard way by once dumping everything raw into the dish and wondering why it tasted like wet noodles. Fresh or frozen vegetables both work, but taking three minutes to sauté them first is the move that separates this version from something forgettable.
Making the Sauce Creamy Without Heaviness
The secret here is using both broth and milk instead of cream, which keeps the sauce rich and silky without that heavy, coating-your-mouth feeling that comes from cream-heavy versions. The roux—that simple combination of butter and flour cooked together—acts as the thickening agent, and adding the liquid gradually while whisking prevents lumps that can sneak into your casserole. Sour cream added off the heat brings tang and brightness that cream alone never achieves, and it cuts through the richness just enough to keep you wanting another bite. I used to make casseroles with canned cream soup for years, and the difference between that and a properly made sauce is honestly night and day.
The Topping That Makes People Notice
That panko-parmesan topping is where the casserole stops being earnest and starts being genuinely delicious. Panko breadcrumbs stay crispy much longer than regular breadcrumbs because they're cut into larger pieces, and tossing them with melted butter before baking means they brown evenly and develop real crunch. The parmesan adds salt and umami that makes people sit up and take notice, and mixing everything while it's still damp means every crumb stays put during baking. I've learned that sprinkling the topping on after the casserole is partially cooked leads to burning, so going in at the same time as the dish is crucial.
- Make sure the topping mixture feels like wet sand before you sprinkle it; if it's too dry, it won't stay in place during baking.
- Fresh parmesan grates much better than the pre-grated stuff, which contains anti-caking agents that affect browning.
- Don't skip letting the casserole stand for five minutes after baking—it firms up and holds together so much better when you serve it.
 Save to Pinterest
 This casserole has become my answer to the question of what to make when people are coming over and you want to feel like you actually cooked something. It's the kind of dish that tastes like it took hours but rewards you with time back in your evening.
Answers to Recipe Questions
- → What type of noodles works best?
Egg noodles are ideal due to their ability to hold the sauce while remaining tender yet firm after baking.
- → Can I use fresh tuna instead of canned?
Fresh tuna can be used but should be cooked and flaked before mixing to ensure the right texture and flavor balance.
- → How can I make the topping crispier?
Ensure the panko mixture is evenly spread and bake uncovered at 400°F (200°C) until the topping turns golden and crunchy.
- → What are good vegetable substitutes?
Alternatives like diced carrots, green beans, or zucchini can add variety while maintaining a fresh vegetable profile.
- → Can this dish be prepared ahead of time?
Yes, assemble it beforehand and refrigerate. Bake when ready to serve, adding a few extra minutes to ensure the topping crisps up well.