 Save to Pinterest
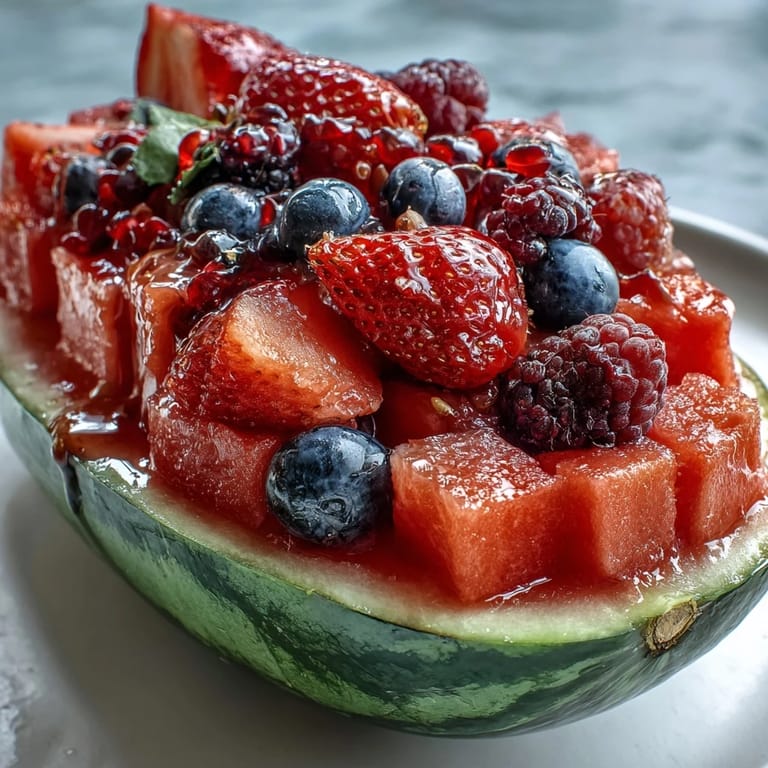
 The moment I decided to carve a watermelon into a serving vessel, I was standing in my kitchen on a sweltering afternoon, staring at this enormous fruit and wondering how to make it feel like an event rather than just another summer snack. My neighbor had mentioned she'd seen something like this at a wedding, all carved and jeweled with berries, and I became slightly obsessed with recreating it. What started as a silly challenge turned into one of those kitchen projects that feels fancy but honestly takes less time than setting a proper table. Now whenever I need to impress without actually cooking, this is my move.
I brought this to a backyard potluck last July, and what I remember most wasn't the compliments—though there were plenty—but watching my friend's three-year-old stand on her tiptoes trying to peer into the carved watermelon, completely mesmerized by the colors. Her mom let her pick out the berries she wanted, and suddenly everyone wanted to do the same, turning the whole thing into this interactive moment. That's when I realized it wasn't really about the fruit; it was about creating something that invited people to participate.
Ingredients
- 1 large seedless watermelon, ripe and firm: This is your canvas, so pick one that feels heavy for its size and has a creamy yellow spot where it sat on the ground—that's the sweet spot indicator.
- 1 cup fresh strawberries, hulled and halved: The slight tartness cuts through the watermelon's sweetness in the best way.
- 1 cup fresh blueberries: These little gems hold their shape beautifully and add pops of deep color that make the whole board sing.
- 1 cup fresh raspberries: Delicate and fragrant, they're worth buying the day before if you can.
- 1 cup fresh blackberries: The deepest, most dramatic color; they're also the most forgiving if you handle them gently.
- Fresh mint leaves for garnish: A handful torn by hand smells better than anything you could buy in a bottle.
- 1 cup seedless grapes, halved (optional): They add a different texture and work especially well if you're serving kids.
- 1 cup pineapple chunks (optional): A tropical addition that makes the whole thing feel like a vacation.
- 1 lime, sliced (optional garnish): The brightness ties everything together and hints at the freshness inside.
Tired of Takeout? 🥡
Get 10 meals you can make faster than delivery arrives. Seriously.
One email. No spam. Unsubscribe anytime.
Instructions
- Wash and dry everything:
- Run your watermelon and all the berries under cool water, then pat them completely dry with paper towels—moisture is the enemy of that gorgeous presentation.
- Create a stable base:
- Use a sharp knife to slice a thin bit off the bottom of the watermelon so it won't roll around on your board like a rebellious beach ball.
- Open the boat:
- Slice off the top third of the watermelon lengthwise in one confident motion, working slowly enough to feel in control but fast enough that you don't second-guess yourself.
- Hollow it out carefully:
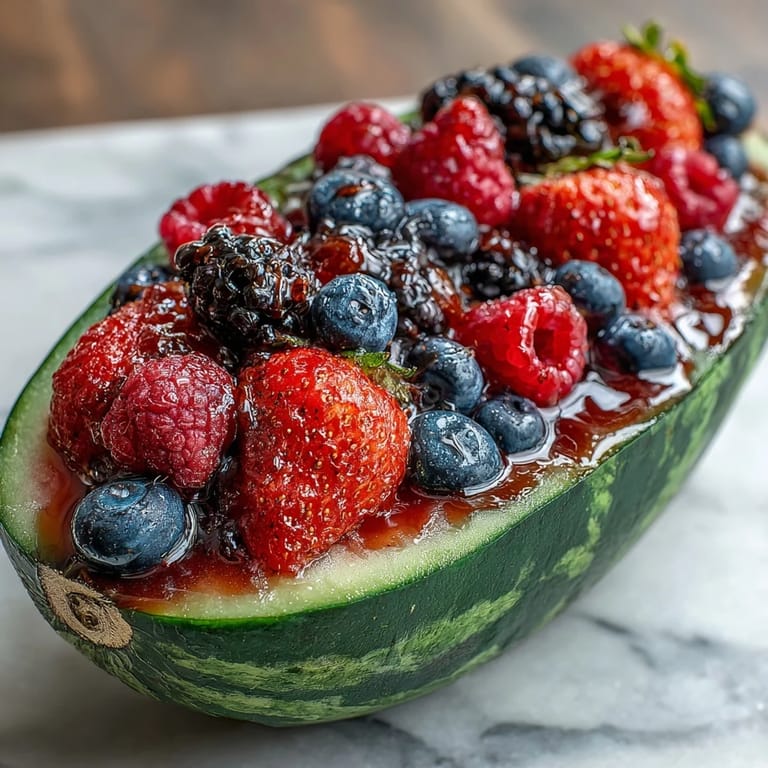
- A melon baller is ideal here, but a sturdy spoon works too if you press and twist gently—you want to leave about an inch of rind so your shell stays structurally sound. This part takes patience but honestly feels meditative.
- Fill and arrange:
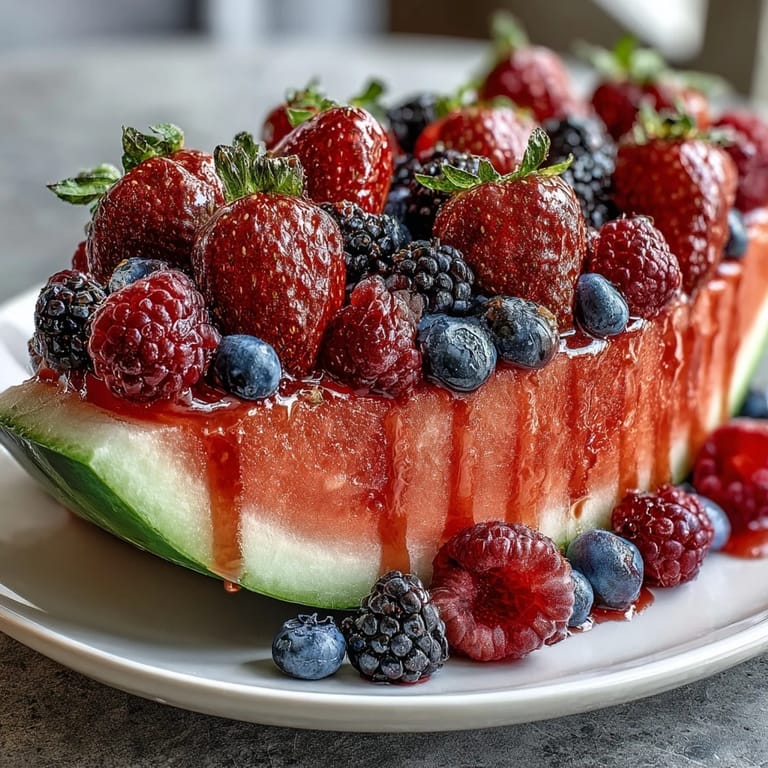
- Return those scooped pieces back into the carved watermelon along with half your berries, creating a loose, colorful mixture inside. Then artfully scatter the remaining berries and optional fruits around the outside of the melon on your board, letting them overlap naturally like you didn't think too hard about it even though you might have.
- Garnish and finish:
- Tear mint leaves and scatter them over the top, add lime slices if you're using them, and step back to admire your work before anyone else sees it.
- Serve with confidence:
- Bring it straight to the table, or chill it for a few hours if you made it ahead—just cover it loosely so the berries don't absorb any fridge smells.
 Save to Pinterest
 There's something almost ceremonial about bringing this to the table—the way people's faces light up, how they instinctively gather around it, how it transforms a simple gathering into something that feels a little bit special. I've learned that the best parts of cooking aren't always in the actual eating; sometimes they're in these small moments of delight.
Seasonal Variations and Swaps
Summer offers the obvious berry abundance, but I've had surprising success in early fall using halved figs, pomegranate seeds, and sliced peaches alongside standard berries. Winter feels less intuitive until you remember kiwis, persimmons, and even pomegranate keep beautifully in the cold, and somehow they look even more striking against that green and red. Spring is all about strawberries and the first raspberries, paired with whatever stone fruits are starting to show up at the farmer's market.
Making It Interactive
One trick I've discovered is setting out small spoons or forks nearby and letting people serve themselves rather than doing it for them—it creates this casual, market-stall vibe that somehow makes everything taste better. You could even scatter the berries more loosely on the board and invite guests to help arrange them for Instagram-worthy chaos, which turns the whole thing into a fun activity rather than just a platter.
Storage and Timing Tips
This is one of those rare dishes that actually improves slightly if you make it an hour or two ahead, as the cut watermelon softens just enough to be easier to spoon while still looking pristine. The key is keeping everything cold and only adding delicate berries like raspberries in the final moments before serving, since they bruise easily and tend to shrivel if they spend too long in a cold environment. If you're transporting it, lay it on a cutting board in the center of a cooler with ice packs on the sides, and it travels surprisingly well.
- Make the carved base and chill it while you prepare the berries and fruits.
- Do the final berry arrangement no more than 30 minutes before serving for maximum freshness and visual impact.
- If you must make it ahead, cover the finished board loosely with plastic wrap and keep it in the coldest part of your fridge.
 Save to Pinterest
 What started as a way to make fruit feel fancier has become my favorite thing to bring to summer gatherings because it somehow manages to be both effortless and impressive. That's the real magic here.
Answers to Recipe Questions
- → How do I prepare the watermelon for carving?
Slice off a thin portion from the bottom so it sits flat, then cut off the top third lengthwise to form a boat shape. Scoop out the flesh carefully, leaving about an inch thick shell.
- → Can I use other fruits besides berries?
Yes, seasonal fruits like kiwi, mango, or peach slices can be added for extra variety and color.
- → What tools are needed for carving and assembling?
A large sharp knife, melon baller or spoon, cutting board, and a serving plank or platter are essential.
- → How should I garnish the fruit platter?
Fresh mint leaves and lime slices add vibrant color and a refreshing aroma to the presentation.
- → Is this fruit arrangement suitable for dietary restrictions?
Yes, it's vegetarian, vegan, gluten-free, and free from major allergens, making it versatile for many diets.