 Save to Pinterest
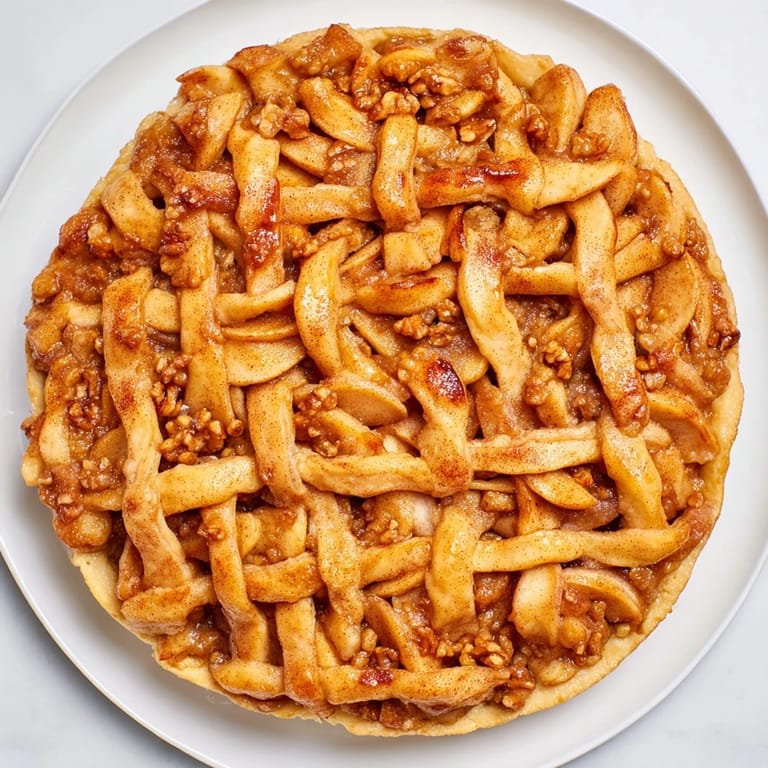
 The first time I attempted a lattice dessert, I was standing in my kitchen on a gray October afternoon, watching my neighbor through the window arrange apples with this incredible precision. She made it look so effortless that I thought, how hard could weaving apples really be? Turns out, it's part patience, part geometry, and entirely worth the focused quiet time. When that golden lattice came out of the oven, catching the late afternoon light, I understood why she made it look like art. Now I make this for every autumn gathering, not because it's complicated, but because it's honest work that tastes like care.
I remember pulling this out of the oven at my sister's house last November, and the whole kitchen suddenly smelled like cinnamon and caramelized apples. My nephew watched from the counter, asking questions about why we were making a puzzle out of fruit, and by the time I explained the whole thing, everyone was invested in whether it would hold together. It did, and we all sat around the table in that satisfied quiet you get after something looks as good as it tastes.
Ingredients
- All-purpose flour (1 1/4 cups): This is your foundation, and cold ingredients are everything—chill your butter until it's actually hard so your crust turns flaky and tender.
- Unsalted butter (1/2 cup, cold and cubed): Cold butter creates the pockets that make pastry shatter when you bite it; if it softens, your crust will be tough instead.
- Granulated sugar (2 tbsp for crust): Just enough sweetness to balance salt without making the base taste like dessert.
- Salt (1/4 tsp): This brightens the flavor and keeps everything from tasting flat.
- Ice water (3–4 tbsp): Keep it cold—literally ice water, not room temperature—and add slowly so you don't overwork the dough.
- Walnuts, chopped (1 cup): Toasted walnuts would be even better, adding a deeper nutty note that makes people ask what your secret ingredient is.
- Honey (1/4 cup): This acts as both sweetener and binder, creating a soft layer that holds everything together without being cloyingly sweet.
- Light brown sugar (2 tbsp): Brown sugar brings molasses depth that regular sugar can't quite match.
- Ground cinnamon (1/2 tsp for filling): A warm spice that complements apples better than almost any herb or spice I know.
- Salt (1/8 tsp for filling): A pinch that makes the sweetness feel less obvious and more rounded.
- Firm, sweet-tart apples (3 large): Honeycrisp or Granny Smith hold their shape and have that perfect balance of tartness and sweetness—mealy apples will fall apart into mush.
- Lemon juice (1 tbsp): This stops the apples from browning and adds a bright note that keeps the dessert from feeling one-dimensional.
- Granulated sugar (2 tbsp for apples): A light coating that caramelizes slightly as the apples bake.
- Ground cinnamon (1/2 tsp for apples): One more layer of warmth that ties the whole thing together.
Tired of Takeout? 🥡
Get 10 meals you can make faster than delivery arrives. Seriously.
One email. No spam. Unsubscribe anytime.
Instructions
- Heat the oven and prepare your pan:
- Set your oven to 375°F and get your 9-inch tart pan or pie dish ready with a light coating of butter or cooking spray. This is the moment to calm down and read the rest of the steps before you begin—rushing leads to mistakes.
- Build the crust:
- Combine flour, sugar, and salt in a bowl, then cut in your cold butter using two knives, a pastry cutter, or your fingertips until everything looks like rough breadcrumbs. The key is not letting the butter warm up—those tiny bits of cold butter are what create flakiness. Drizzle in ice water slowly, stirring gently, until the dough just barely comes together without crumbling apart.
- Line the pan and chill:
- Press your dough evenly into the bottom and sides of your pan, making sure the edges are even and the bottom is snug. Prick the base all over with a fork to prevent puffing, then slide it into the freezer for 15 minutes—this rest is not optional if you want a crispy crust.
- Blind bake the crust:
- Line your chilled crust with parchment paper and fill it with pie weights or dried beans to keep it from bubbling up. Bake for 12 minutes, then carefully remove the weights and parchment and bake for 5 more minutes until the bottom is set and the edges are just barely golden. Let it cool for a moment while you move on.
- Make the walnut-honey base:
- In a bowl, stir together chopped walnuts, honey, brown sugar, cinnamon, and salt until everything is evenly coated. Spread this mixture smoothly over your cooled crust, creating an even layer that will anchor your apple lattice and add sweetness and texture in every bite.
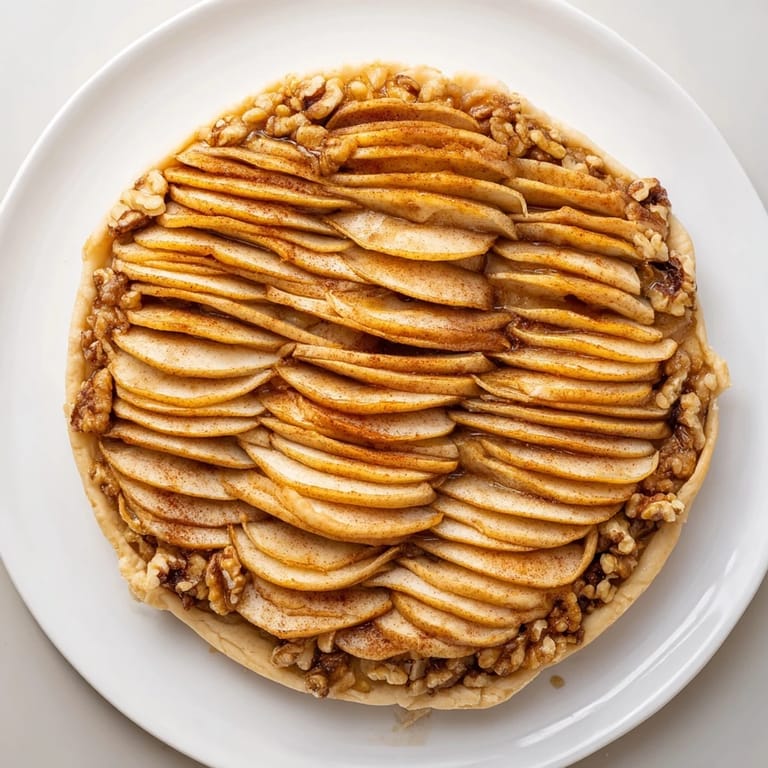
- Slice and season the apples:
- Peel your apples if you prefer (I usually don't), then core them and slice them very thinly—about 1/8 inch thick—which is thinner than you probably think. Toss the slices immediately with lemon juice, sugar, and cinnamon so they stay bright and get a light coating of spice.
- Weave the lattice:
- On a large piece of parchment, lay out half your apple slices in parallel rows with just a tiny overlap between them. Now take your remaining slices and weave them over and under the first set to create a diagonal lattice pattern—it sounds fussy, but it's actually meditative once you start. When you're happy with it, carefully slide the whole parchment onto your tart and trim any ragged edges, then gently press the lattice so it makes contact with the filling below.
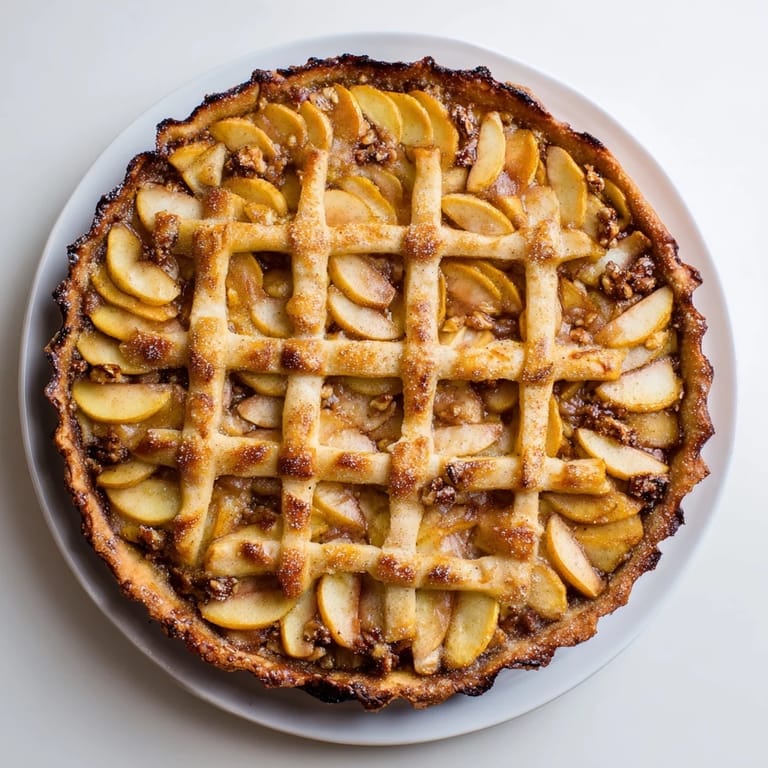
- Bake until golden:
- Loosely cover the tart with foil to protect the edges and bake for 20 minutes, then remove the foil and bake another 10–15 minutes until the apples are tender when you poke them gently and the edges are lightly golden. Watch it during the final minutes so you don't overbake—the moment the apples soften is the moment to pull it out.
- Cool and serve:
- Let the tart cool for at least 20 minutes before slicing, which gives the filling time to set and makes it easier to get clean pieces. Serve it warm or at room temperature, and if you want to get fancy, brush the lattice with a little warmed apricot jam for extra shine.
 Save to Pinterest
 There's something about setting this tart down on a table and watching people's faces that reminds me why I cook at all. It's not just about the taste, though the way the honey and walnuts play against the sharp apples is genuinely delicious. It's about the moment when something you made with your hands becomes part of someone's memory of an afternoon or evening.
Why Your Apple Variety Matters
I learned this the hard way after trying to use Red Delicious apples once—they turned to applesauce in the oven and looked sad instead of elegant. Honeycrisp and Granny Smith apples hold their shape because they're firm and have the right balance of sugar and acid. If you're in the mood to experiment, Pink Lady apples work beautifully too, bringing a slightly different sweetness. The rule I follow now is simple: if an apple is good enough to eat fresh, it's probably good enough for your lattice.
The Crust Secret Nobody Talks About
Everyone focuses on keeping things cold when making pie crust, which is true, but what they don't say is that the real magic happens in the resting. Those 15 minutes in the freezer before baking aren't boring—they're when the gluten relaxes and the butter stays separated, which is exactly what you want. I used to skip this step thinking I was being efficient, and my crusts were always tough. Now I treat it like a non-negotiable part of the process, like meditation before the oven.
Creative Variations and Personal Touches
Once you've made this once and felt confident with the lattice, start playing. I've done versions with pecans instead of walnuts, switched the honey for maple syrup, and even added a tiny pinch of cardamom to the apple mixture for something unexpected and warm. The framework stays the same, but small changes become your signature. One autumn I drizzled the whole thing with dark chocolate after cooling, and it became something entirely new.
- Toast your walnuts in a dry pan for two minutes before chopping to deepen their flavor and add an extra layer of warmth.
- If you have time, make your own crust the day before and keep it wrapped in the fridge—it actually gets better as the flavors settle.
- Serve with vanilla ice cream or lightly whipped cream, though honestly, it's wonderful on its own.
 Save to Pinterest
 This dessert reminds me that the most impressive things don't need to be complicated—they just need attention and a little bit of love. Every time someone takes a bite and their eyes close for just a second, I'm grateful I decided to try it.
Answers to Recipe Questions
- → How do I create a perfect lattice with apple slices?
Slice apples very thinly (about 1/8 inch) and toss with lemon juice to prevent browning. Lay out half the slices in parallel rows, then weave the remaining slices over and under to form a neat lattice. Handle carefully when transferring.
- → Can I substitute walnuts with other nuts?
Yes, pecans work well as an alternative, bringing a slightly sweeter and buttery flavor that complements the apples and honey nicely.
- → What type of apples work best for the lattice top?
Firm, sweet-tart apples like Honeycrisp or Granny Smith hold their shape well and balance sweetness with acidity, making them ideal.
- → How can I ensure the crust stays crisp after baking?
Blind bake the crust before adding the filling to prevent sogginess. Using pie weights or dried beans during baking also helps maintain the crust’s structure.
- → Is it necessary to brush the lattice with jam?
Brushing with warmed apricot jam after baking adds a glossy finish and extra sweetness but is optional based on preference.